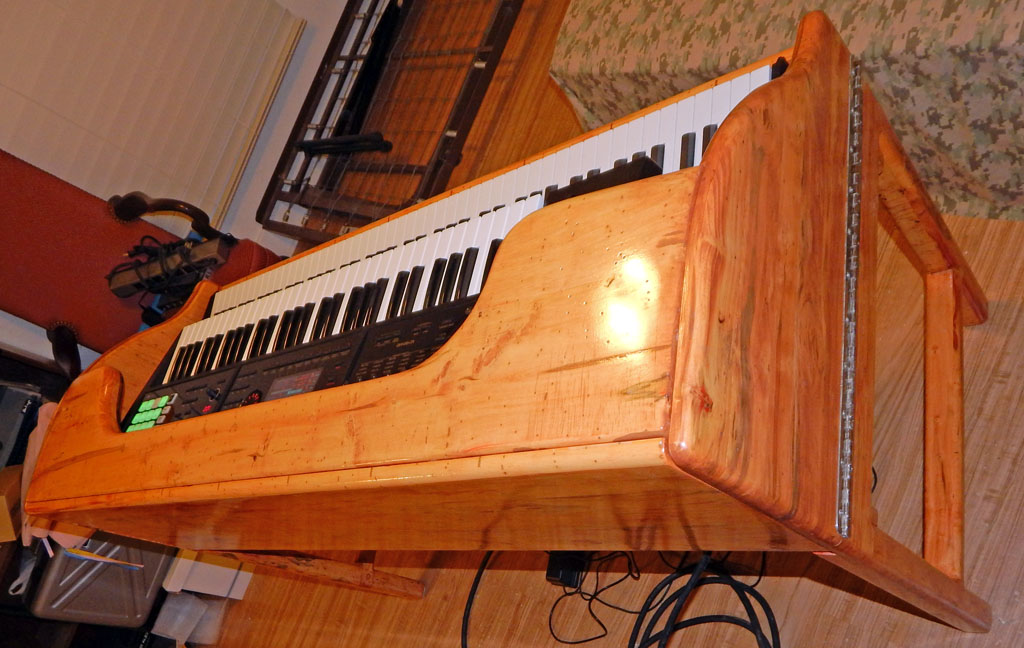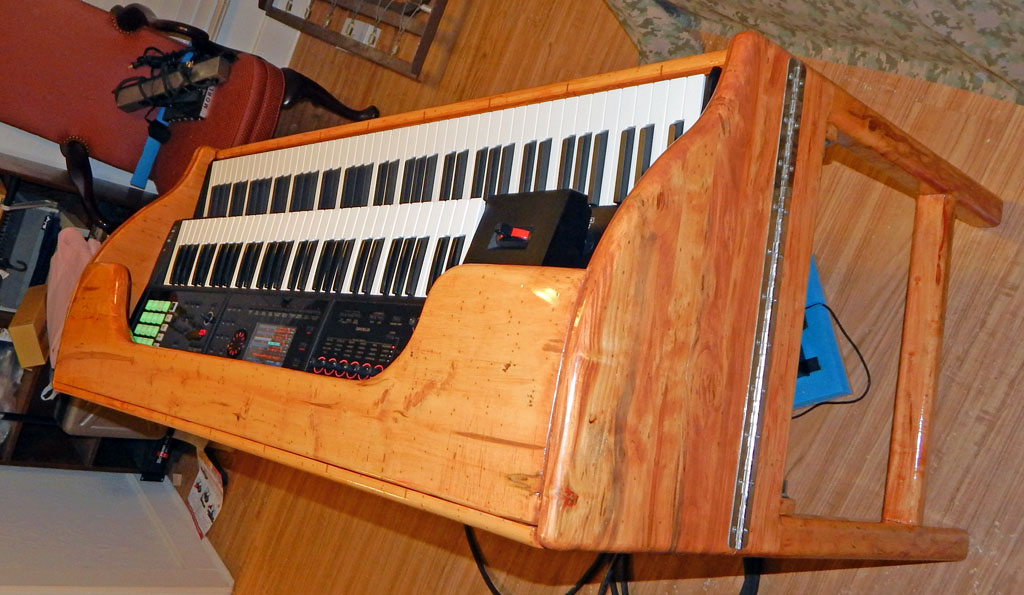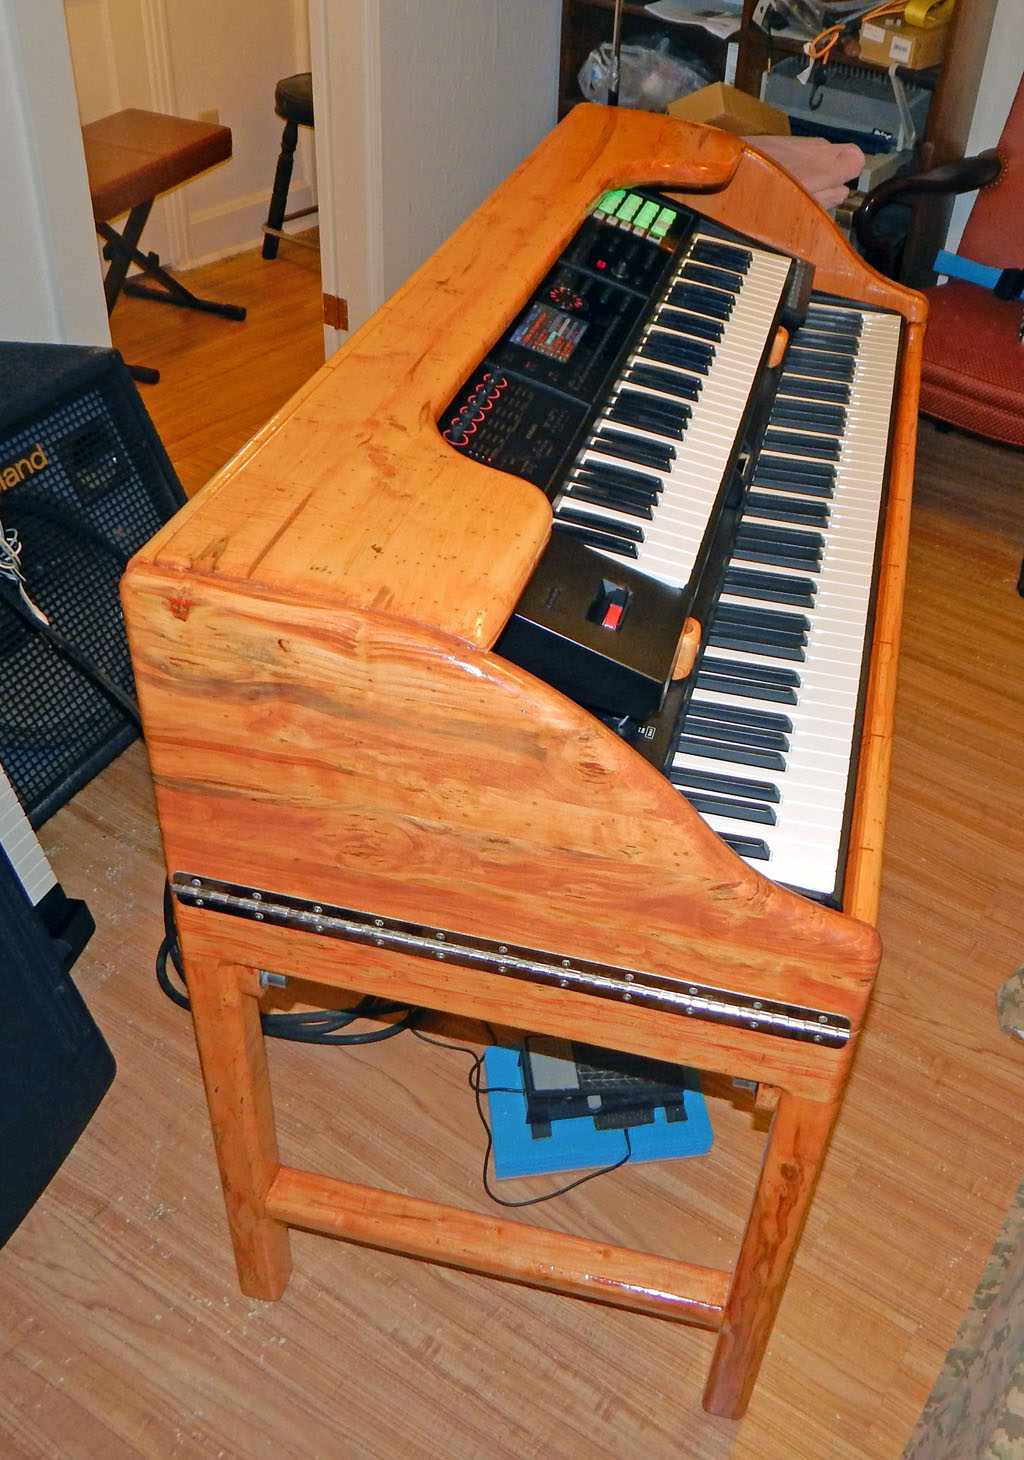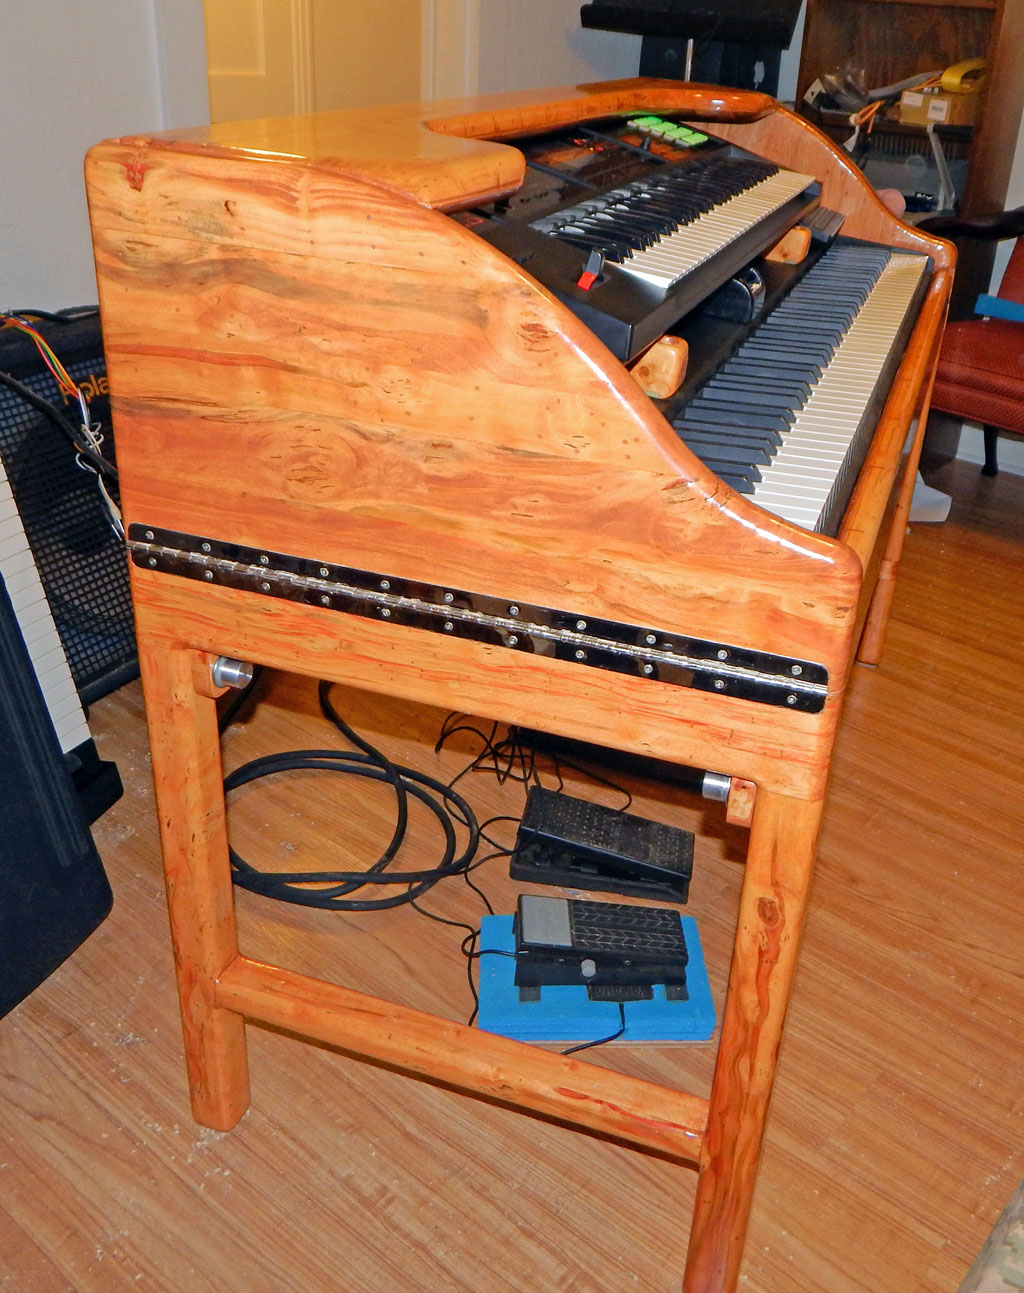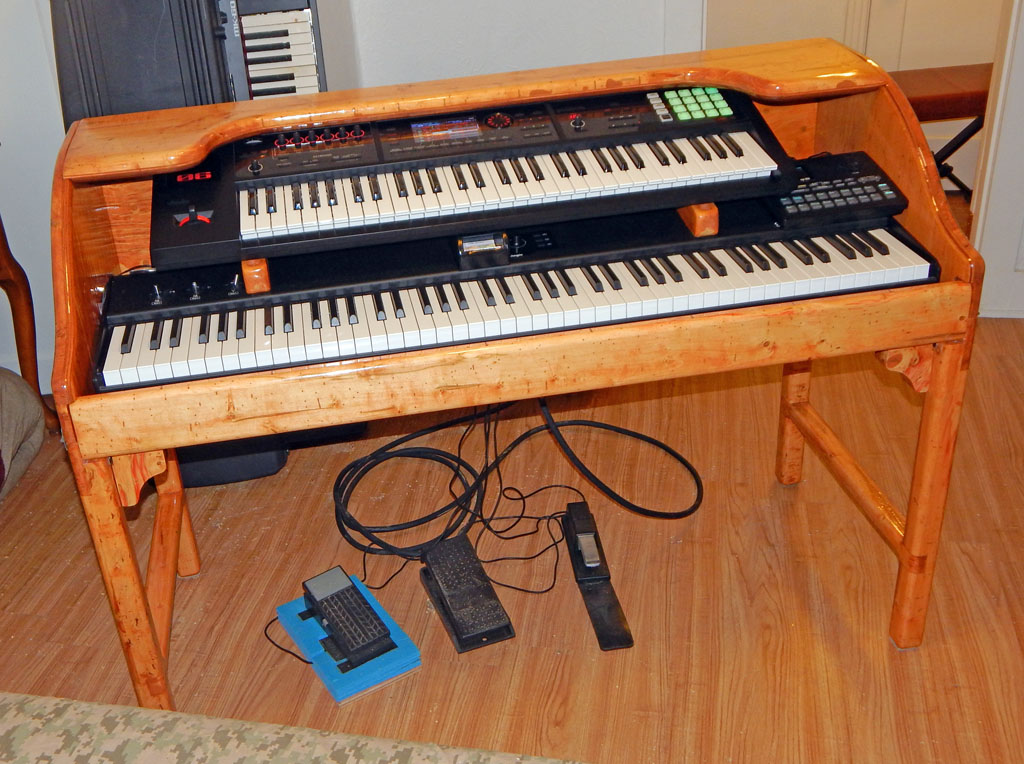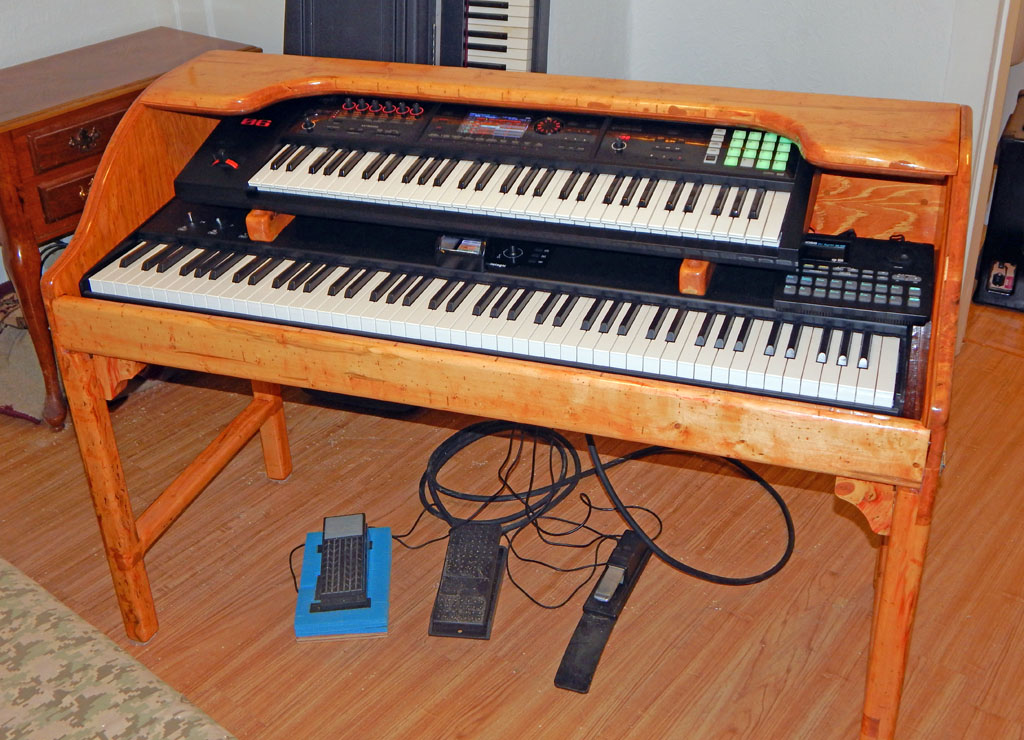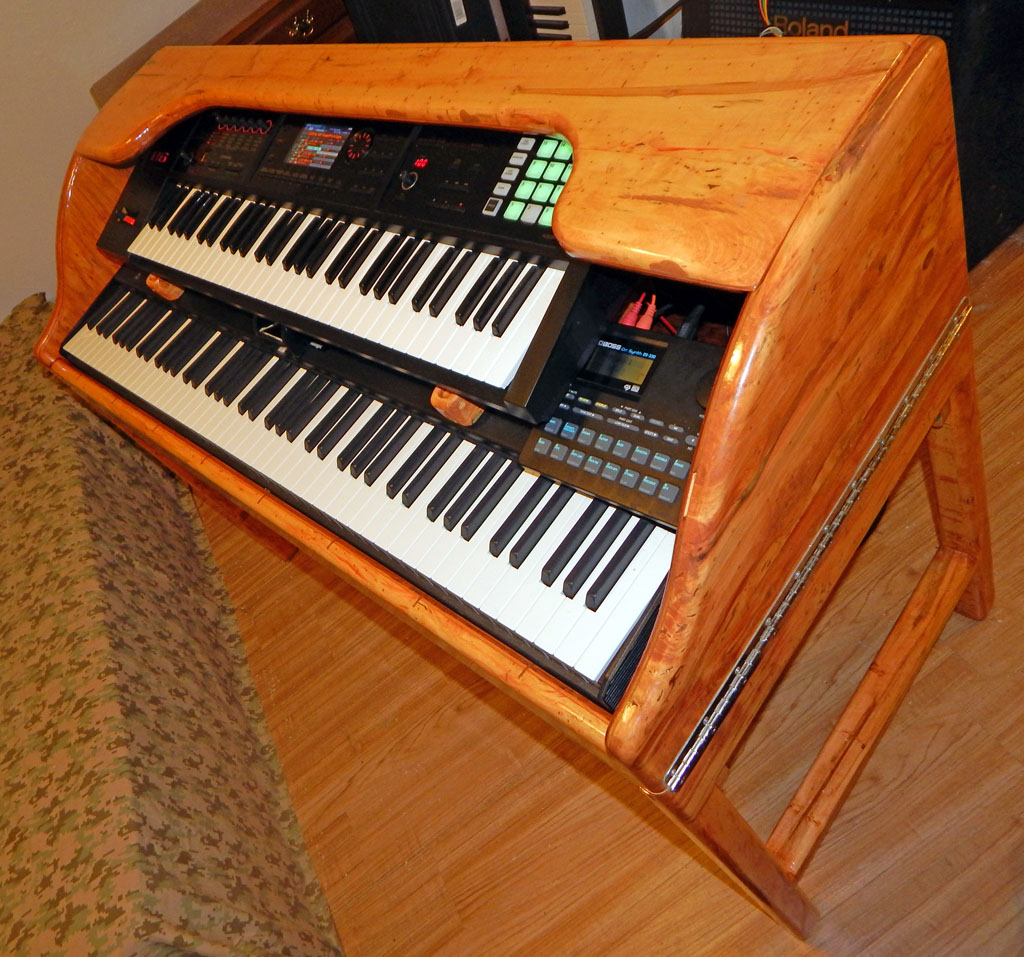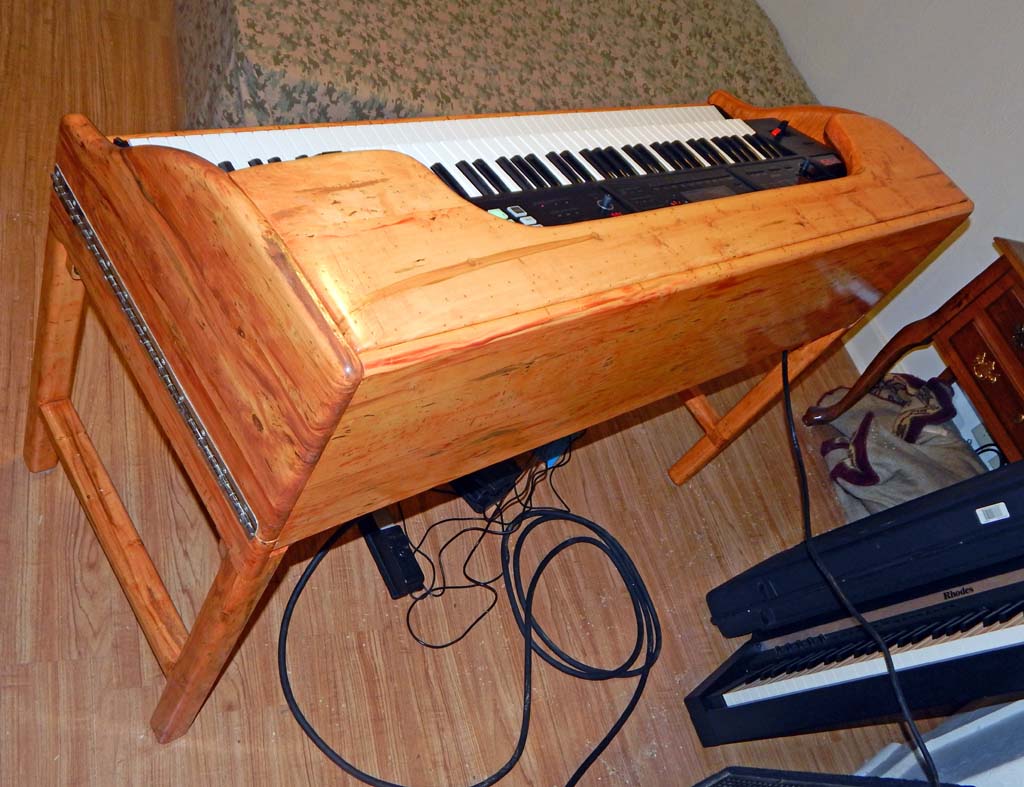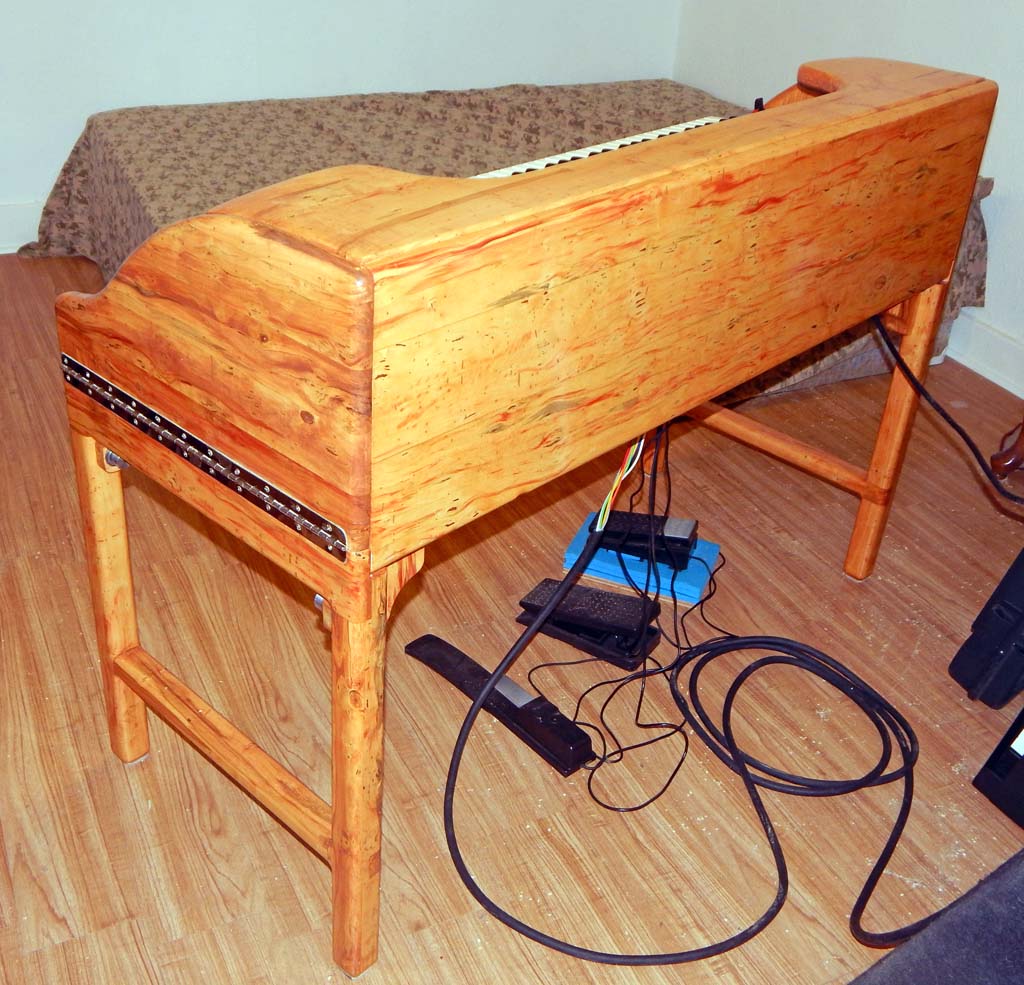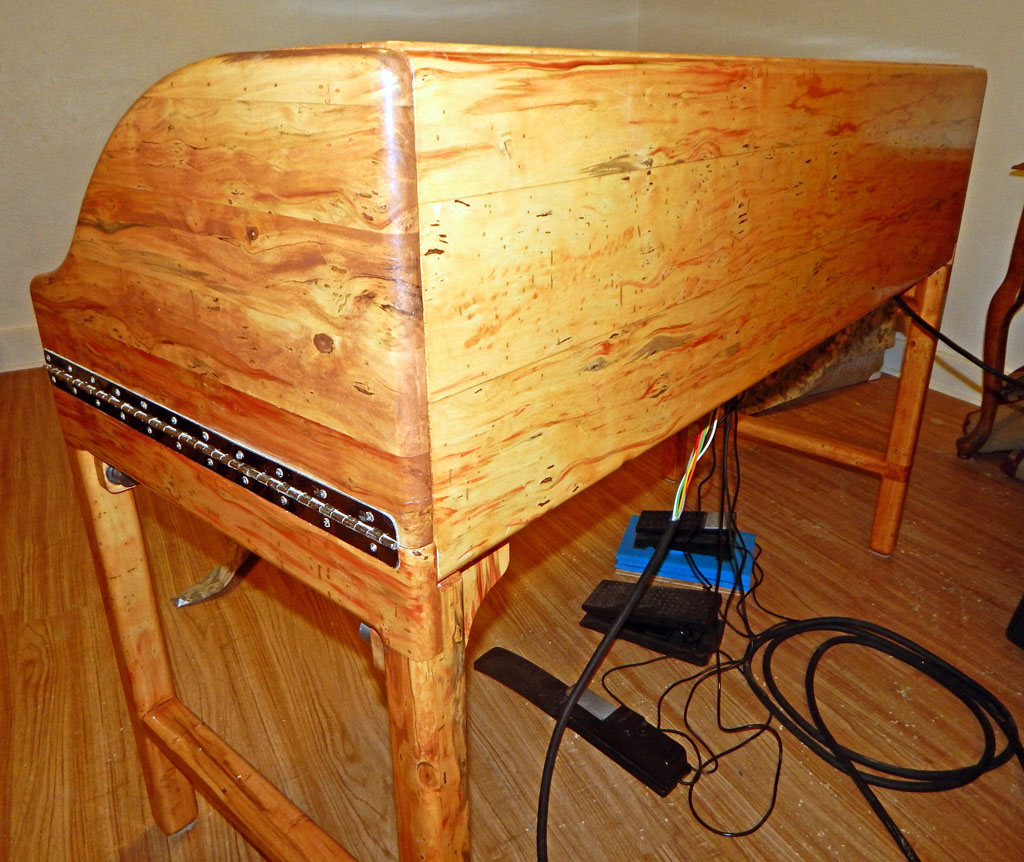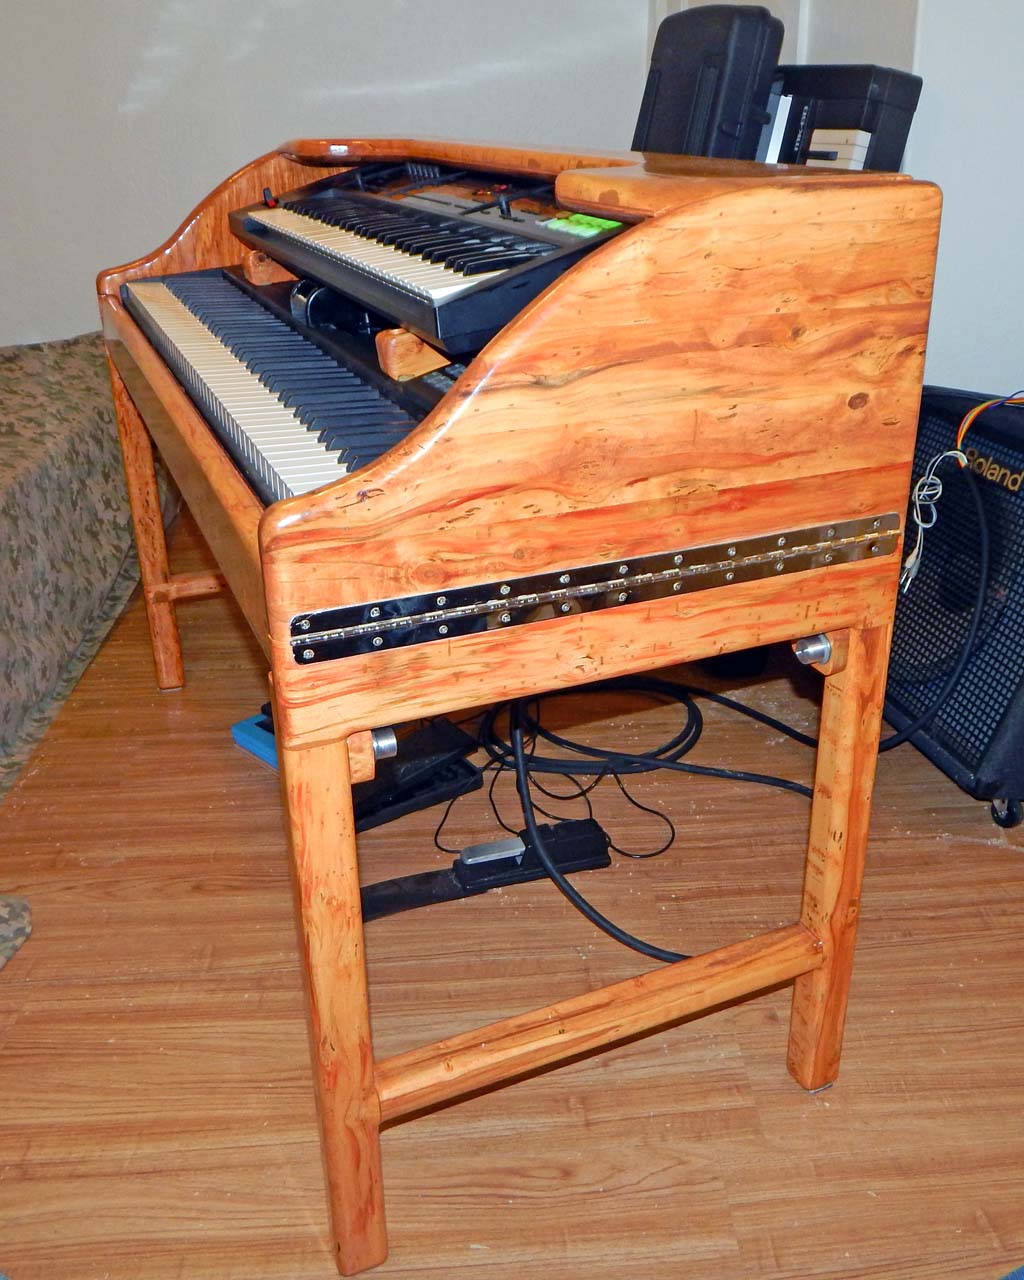

(Numerous gratuitous pictures at the end of this article)
This keyboard stand is made of boxelder wood and plywood. A few years ago ripped some fallen boxelder trees from my back woods, plus a couple of boxelders cut because the wife thought they excessively shaded other growth. Chainsaw ripped the logs, stickered and stacked in a shed to dry. After a few years the wood is probably as dry and stable as it's gonna get.
Boxelder is supposedly related to the maple family, though lighter-weight and softer than hard maples. Boxelder is relatively hard wood but not as hard as rock maple or white oak. Boxelder tends to have dramatic grain patterns-- A beautiful wood if one enjoys insane grain. I gather that boxelder is most always infected with a parasitic or perhaps symbiotic fungus which causes dramatic streaks of bright red and other colors throughout the wood. A single boxelder board could contain brown streaks, red streaks, blue “fungoid” patterns, burl-looking and quilted-looking regions-- All on different sections of a single board!
I gather that boxelder is also commonly worm infested-- Even boxelders which have lived a long time and appear healthy. Supposedly it is common for boxelder boards to be riddled with about 1 mm diameter worm holes. To get a smooth finish, I filled the worm holes with elmers red-oak colored wood filler. After stain and finishing, the filled worm holes look like a scattershot of small brown dots visible in some of the pictures.
Objectives for the keyboard stand--
Portability with a minimal number of separate pieces to tote: The stand folds up via several piano hinges. The sides fold down flat to the legs. Then the legs fold down flat under the keyboard base. The front and back boards fold down flat atop the keyboard base. The top piece is the only separate large section to carry. When folded up, the stand is only about 6 inches thick. When folded up, it is about 25 inches wide and 54 inches long.
The total list of parts to carry--
Main keyboard stand assembly
Keyboard stand top panel
Two small wood bottom braces to make sure the thang doesn't tragically fold up on-stage
8 thumb screws to attach the small bottom braces
Two small wood pieces shaped to hold the top keyboard 2 inches above the bottom keyboard.
All the small parts fit in a medium-size nylon duffel bag. The main assembly and top are wrapped together in a shipping blanket, held together for travel with bungee cords. There are two “hard points” under the keyboard stand base for attaching a 2 inch wide, thousands-of-pounds strength nylon towing strap to use as removable handle/shoulder strap.
I have not weighed the stand but am guessing maybe 75 pounds. Wish it would be lighter-weight, but on the other hand its about the same weight as a small-to-medium-size speaker cabinet, maybe par for the course lugging stuff to a gig. Much easier to move than hammond b3, leslie, or medium-to-large-size speaker cabinets.
Quick setup and tear-down: This has fairly fast setup or tear-down. After toting in the two big pieces wrapped together in a shipping blanket, plus the duffel bag full of small parts-- Fold off the shipping blanket, fold out the legs, attach the leg braces with thumbscrews, stand it up, fold out the front and back boards, fold the left and right sides into position, then finally put the top board in place. Less than five minutes. The sides lock the front and back boards so that the front and back boards can't collapse so long as the sides are in place.
Typically the assembly would not be in continuous order as described-- After folding out the legs, standing it up and folding out the front and back boards-- Before raising the sides and adding the top, the stand is “open” making it easy to mount keyboards and run wiring. The keystand base has three 2 inch diameter cabling holes and adequate room inside for AC power strip, wall wart transformers and such.
So before raising the sides and placing the top board, typically one would mount the keyboards, connect power, control and audio wiring, running snakes out the bottom holes. There is plenty of elbow room to place the keyboards and run the cabling before that final step of raising the sides and placing the top board.
Good stage presence: A good-looking stage will not sound any better, but audiences can be visually oriented. A good-looking stage does no harm and “on average” could be beneficial. To my recollection, keyboards such as Hammond B3 or grand piano have excellent stage presence. And such as suitcase rhodes and electric grands. Or some of the “monster synths” of yesteryear such as original Oberheim 8 voice or Matrix 12, Prophet 10 or T8, Yamaha CS-80.
Some nice keyboards looked “dinky” on stage. Old turd-brown wood wurlies looked substantial enough but if a fella was up on stage playing ONLY a little plastic-top wurlie 200 he tended to look like the Peanuts character Schroeder playing his dinky toy piano.
Stage aesthetics are somewhat different than “living-room aesthetics” though some keyboards such as B3 or grand piano look great in either environment. For instance, harking back to the 1960's, there were some portable combo organs built thin top-to-bottom, with attractive brushed aluminum panels and tasteful gray naugahyde. Those instruments looked nice in a music store and were not a complete eyesore in a living-room. However, the gray color and thin top-to-bottom dimension caused them to essentially disappear on stage. A camo keyboard. The audience sees a fella up there apparently playing SOMETHING but maybe he's just playing air-keyboards!
On the other hand, some combo organs such as Farfisa Combo Compact were big boxy thangs made of shiny plastic and naugahyde in eye-jarring color schemes. A wife or girlfriend might have hysterics on sight of such an ugly monstrosity in the living-room, but they looked FABULOUS on stage!
Typical modern keyboards are “as small and thin” possible, most often solid black or some other tasteful color scheme. They look good in home or studio, but on-stage might be difficult to see and lacking in stage presence.
Then there is the issue of clutter-- Keyboard clutter if there are numerous different-shaped boxes piled willy-nilly on a stand reminiscent of temporary construction framing. And cable clutter, zillions of wires going from everywhere to everywhere else.
Maybe the typical audience does not care about stage clutter. I do not know why, but in my experience the odds are excellent that the person writing the paycheck hates stage clutter and will complain if given the opportunity. The venue executive or bar manager or the dad paying for the wedding reception or whatever. Those people seem most probable to be happy in the absence of stage clutter. Perhaps they believe in Elvis movies-- Elvis leaps up on a table with just an acoustic guitar and fabulous personality. No microphone and no band, instantly entertaining a full house with no ugly equipment and no ugly cables.
So I was thinking that a keyboard stand with good cable-hiding and which looks massive and reminiscent of a big organ, might have good stage presence. Given a good-looking rig, people with tin ears might be more easily fooled-- “The gear looks purty so maybe that monkey knows what the hell he's doing with it.”
This keyboard stand is “attractive” made of wood. It looks fairly massive. I picked boxelder rather than oak, maple or walnut because boxelder is gaudy with lots of “character”. Which might look better on-stage than walnut or maple or whatever. Though for my taste it doesn't look bad in the house either. Premium cuts for wood flooring and such tend to have such consistent board-to-board grain and color, that one wonders why the customer didn't just buy artificial grain plastic flooring which is similarly “perfect and consistent”. So it may be that typical customers shopping for a home grand piano wouldn't want “insane grain”. If you want an “insane grain” floor, you should buy the lowest-grade boards, not the premium stuff. The premium stuff is so perfect that it looks like plastic!
A solid non-wobbly keyboard support: I suspect that a reason Rhodes, B3 and Grand Piano keyboards feel so good is that the instruments are so massive that they feel real solid to play. Have had numerous “top notch” pro portable keyboard stands over the years which IMO were all too wobbly. Even an excellent-feeling keyboard action seems spoiled by a wobbly stand. Long ago, the years I spent playing house gigs, if portability was not necessary, my keyboard stand was a big heavy plywood box. The simple heavy plywood box felt more solid than any portable fold-up keyboard stand I ever had.
This wood keyboard stand feels rather solid and non-wobbly to me.
My woodwork is not very precise though I tried to cut the piano-hinge mating joints as tight as I could do it. Experimented with fairly strong neodymium magnets hoping to make the folding joints “non-wobbly” similar to a glue joint. If “glue” magnets are too strong, it would be hard to fold up the stand. If too weak, the magnets would be a useless waste of time and materials.
Magnets are most-strong in direct contact with iron or another magnet. Attraction is drastically diminished if magnets lose direct contact. Magnets in the joints, mounted with good-enough tolerance, ought to reduce wobble similar to glue joints, so long as the “wiggling force” is too weak to pull apart the magnets.
I didn't have any idea how strong to spec such magnets. They are measured several ways though a common measurement is the force required to pull a test magnet away from a thick iron plate. By approximation, if you have two magnets which measure X pounds by this test, then it should require about 2X pounds to pull the two magnets apart from each other. There are variables regarding the configuration, leverage, etc.
I ordered a quantity of neodymium cylinder magnets. One type is 0.375 inch diameter and 0.25 inch long with an 8.5 pound pull force. Another type is 0.25 inch diameter and 0.3125 inch long with a 3.5 pound pull force. So a pair of the “big ones” would need about 17 pounds pull-away force and a pair of the “small ones” would need about 7 pounds pull-away force. I planned to experimentally install them in pairs to each joint until the attraction is “strong enough to hold it together but weak enough to allow easy disassembly”.
I installed 68 pounds of pull-away force holding each leg open, which seems adequate to eliminate some leg wobble, but that is nowhere near strong enough to safely keep the legs from collapsing if the keyboard stand gets a moderate sideways shove. That is why the legs also have safety braces. The safety braces held by thumbscrews were built “as snug as I could make them” but still allow more side-to-side wobble than I'd prefer on the piano hinges. The 68 pounds of magnet seemed to help “tighten up” side-to-side leg wiggle.
The short front panel only needed about 28 pounds pull-away force to keep it securely open after it is opened. The sides lock the front and back panels from folding in, but before the sides are raised its nice to keep the fronts and backs from accidentally falling down. Also, the attraction is useful to minimize wobble around the piano hinges.
The tall heavy back panel seems to reliably hold itself upright with about 68 pounds (eight of the 0.375 diameter magnets). Just enough pull to reduce wobble and prevent the panel from accidentally slamming down on the fingers during assembly.
The leg, front and back hinge magnets work at disadvantage because they are on the short end of a lever. The legs are about 25 inches on one side of the piano hinge, and the leg joint magnets are only about 1.5 inches away from the other side of the piano hinge. So it doesn't require a large force on the long end of the lever to equal 68 pounds on the short end of the lever. The back panel is about 12 inches on one end of the lever, and the magnets are about 1.5 inches on the other end of the lever.
However, the magnet leverage is much better holding the side panels to the front and back panels, and holding the top panel to the side and back panels. Mounting two pair of magnets near each back and front top edge of the side panels, 68 pounds pull seems to hold the sides closed VERY SECURELY. I wouldn't want to use a drastically bigger magnetic force on the sides because with 68 pounds you have to pull pretty hard to get the sides loose before folding them down.
The top panel is attracted to the back panel by three pairs of magnets, 51 pounds. The top panel is attracted to each side panel by 34 pounds. Magnets pull apart easiest by sliding them horizontally away from each other. So it is easy to remove the top panel by tilting it up to disengage the side and back magnets. But it is a bit of work to try to get the top off unless you tilt it off.
With the top panel in place, each side panel is held in position by a total of 102 pounds on “the long end of a lever”. Or a total of 204 pounds pull between the two side panels. I found it interesting that when the top panels are in place, they better-brace the leg hinges. The legs have noticeably less wobble with the sides-up compared to the sides-down. The sides-down wobble isn't awful. I was just surprised how much extra bracing results from raising the sides.
Before I finished building the stand, I had planned to add “disaster braces” between the sides and the back. I may yet add internal thumbscrew-attached top safety braces. However, the top assembly holds itself together so well solely with magnets, dunno if I will bother. Have been working on this keyboard stand long enough to risk burn-out if I fool with it much longer.
Scenarios needing top safety braces might include a drunk chick trying to sit on the keyboard stand, or a drunk big dude leaning hard into it, putting most of his weight on the top. A grand piano or B3 would put up with that, and this stand would put up with it along with top braces. So maybe the “solid” look of the stand could invite such stupid abuse.
I mean, if a drunk climbs up on an apex portable stand then he will go down in flames. But in that case maybe an apex stand looks sufficiently flimsy that the typical drunk would be smart enough to stay away.
The following gratuitous pictures were shot in a tiny room in the basement. In such a small room, some of the pictures were taken at distance close enough to distort the perspective. In some pictures the assembly appears “taller” or “chunkier” than in real life. The main cabinet is about 24 inches front-to-back and about 12 inches tall. It isn't really “stupid tall and narrow” in real life.

